Monday, October 26, 2009

VSO#5 ep. 4 1/2


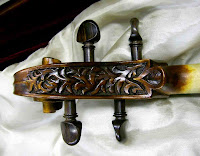
found myself practicing a little more these days. some of the technical problems i'm having seems as obstinate as this cold i've had on and off for 2 months. as for VSO #5, the only progress to report has to do with getting an early start to the recurve, or i think some would call it the scoop, i'm not sure about violin terms because i'm not a violin maker, but the picture should speak for itself:


sob sob...
to be continued

Friday, October 16, 2009

making a brass flute headjoint


time to finish an old old project...
i've wanted to make a flute headjoint since i was a kid. a number of  years ago, i bought a few broken flutes off eBay and took them apart quite brutally to learn how they were made. i din't know a thing about solder at that time, so i burnt the plating off the poor instruments to take them apart. it was hell when the pads caught fire... so please don't try this at home. anyway, i've decided to make at least a headjoint, if not an entire flute one of these days.


π  is my friend


to make a flute headjoint, i first measure and cut a sheet of brass to length. dimensions are easy, we know the flute is 19mm in diameter and the headjoint tapers to 17mm at the cork assembly. using the formula Circumference = π × diameter , i can work out how wide the sheet metal needs to be at both ends. the brass i'm using here is 0.016" sheet brass available at most hobby stores.


the tools we need are in the pictures. the specialty roller and mandrel can be found here . the site is not very user friendly/searchable, those of us who carried their book catalogs around in our college days (and who didn't... : ) should have no problems. if not, be patient and look through their Pdf catalogs and find the flute body mandrel and small roller meant for brass instrument repairs and such. i'll need also, soft (plumbing use) and hard (jewelery making use) solder. the different fluxes and my favorite hot little baby, the propane torch.

the most important rule i try to observe when using a torch is: don't be an idiot. i'm not going to show pictures of me soldering because my hands were very busy when the torch was going. i get very nervous using the darn thing. also, this idiot does not want to lead other idiots toward burning down their own kitchens or garages or "shop".


the sheet brass is beaten with the rubber tipped mallet on the mandrel to form a tube. when i get close, i switch to the roller to get more bend and curve out of it. as it gets harder, i soft solder a tab of brass to one end, this helps to hold the thing in place while i work on the shaping the tube. it's easier said than done, i actually spent about an hour trying to make the ends line up and meet to form a tube. 


the small tab is removed and the tube is held in place with broken rings bent from thick steel wire. the ends of the sheet brass is hard soldered together and thus form a seam. hard soldering is pretty nerve wrecking because the brass is thin and it has to be red hot, but heat it too long the thin metal collapses. don't heat it enough the solder goes no where, all in all not a pleasant experience at all. a fan blows at my face constantly so that i may breathe. in my mind, all kinds disastrous accidents are happening... 


after hard soldering, the tube looks like a mess. it needs to be cleaned up. the seam is filed clean and the whole sucker is buffed until shinny. the inside is sanded flat too with emery cloth on a large drum stick.


the lip plate is formed from thicker brass. i don't have a die, so it is beaten into shape on the round end of the flute body mandrel.it's hard to explain how i did it. i just whacked it with the mallet, that's all.the underside becomes a mess and is sanded clean with a wire brush wheel on a Dremel and some emery cloth.


the riser is made from stock brass rod and somehow fitted to the curve of the lip plate... i'm not sure how i did it actually, it just happened... so here's where i am currently:


to be continued...

Thursday, October 15, 2009

VSO#5 ep. 4


the purfling finally got glued in.
the edge will be reduced after this...


to be continued...

Wednesday, October 14, 2009

planning for VSO ??

PROJECT POSTPONED


i started wondering about viola shapes in 2005, i thought about going back to school on a homemade viola. as life would have it, it didn't work out that way. here's what my initial concept looked like:
 
the drawing was eventually made into this VSO in 2008.

 
design ideas were stolen from here and here.

came 2006 i thought about making a cornerless violin and carved a top. but i never completed the violin. it looks like this:


by 2007 i still had nothing but a bunch of ideas. including this one:
it was a massive 16 3/4" viola top made from bent sitka and 2 corners were cut off because i thought they got in the way of the bow. the bending was brutal but the planks took it really well, it has an arch of about 20mm and it is sitting on the dash board of my car right now, slowing cooking away everyday, trapped in my car. it hasn't lost its arch and the crazy glue is still holding the planks together.


i made one VSO in 2008 and 3 so far in 2009. VSO #5 is well on its way and thus my planning for VSO #6. VSO #6 takes on the shape of VSO#1 combined with the 2007 top. it'll be an asymmetric fiddle with 5 strings.
i'm torn. there's a part of me that really wants to build another Amati inspired fiddle and another part of me really wants to to build the asymmetric guy. i don't know... we'll see after VSO #5 is completed.

there was an old article i read in the Strad magazine back in June of 2001 about the so-called "hole-in-the-heart" modification to a fiddle to make C strings respond better on small violas. i started modifying violins and violas like that back in 2005 and came up with some interesting results. among other things, this makes for a great 5 string violin without having to design a purpose built from scratch. it also makes for a great baritone violin if you find just the right strings, which means you have to experiment with detuning viola strings and shortened cello strings. but it does work well with a bit of coaxing, especially the 5 string violin. 

looks like this:


 **************************************************************


to be continued...


Sunday, October 11, 2009

flute projects (still) in the works


here's a fix-a-upper... beat-up old one key flute, no markings, no history, probably 100 years old at least. some keys had been added and subsequently removed and the tone holes plugged. serious cracks lower and foot joint. had it for a few years, thought i would fix it and have some fun.


(still) making my first headjoint. its been a few years in the making too. thought i should finish it this year and move on.


an old friend came back to visit, she's an old wood flute i fixed up for a friend a few years ago. i'm thinking about making a wood headjoint to go with the wood body, it would be so cool...


awesome flutist...
time to go practice...


Saturday, October 10, 2009

i miss home cooking!


へええええっ?!    美味しいね!

 林家小饭馆, 欢迎光临!


time to hit the practice rooms...
more Bach to calm my nerves.


Friday, October 9, 2009

never seen anything like this...

wonder who the heck did all these "repairs". there appears to be work done by 3 different people. the last guy did the worst. he's the one that smeared wood glue all over the top in my last post, like jam on toast.


how's this for a neck block?


the sides and back does not match...


 the fingerboard was glued onto pieces of pine acting as shims because the neck angle as dictated by the the neck block would have planted the fingerboard about 10mm off the top at the far end.


 there's plenty of saw dust used as filler here and there.

here's the top again:


hmm... i know, it's gonna be a waste of time...


on a different note


and if you are in heavy metal...


yes, it's made of aluminum


hmmm...

Thursday, October 8, 2009

gotta be kidding!!??


??!!

if you are on a long journey, and you are new, it's your job to slay at least a few dragons on the way... you are expected to! i came across the lizard in the picture above and feel like it's my destiny to piece it back together... kidding. no way!

so VSO#5 has grounded to a halt due to this thing called "life". how inconvenient.


this is where i'm at. the art of purfling inlay continues to elude me. i get nightmares thinking about purfling. i get nervous and usually postpone the operation at least twice before i actually do it. you see, i use a purfling router (1.27mm bit for the 1.3mm purfling) and jig that cuts so fast, a slip of the hand means all the work prior just went down the drain. i can do it by hand, but it takes me 6 times longer. missing in the picture is my dead luthier's foot pedal switch. it helps to ease the anxiety a little without having to fumble for the on/off switch after cutting. plus if i had a heart attacking and die while routing, at least the damage to the work will be mitigated somewhat... the Wecheer rotary i use will take all the bits and jigs made for the Dremel tool.

i use violin fiber purfling as opposed to wood purfling. i wanted to make violins one time and ordered a bunch dirt cheap from here, i remember they used to have stuff i could afford... so until my violin purfling gets used up, it's violin purfling on everything. with wood purfling, i can pound the sucker into the channel and later scrape clean for definition. i am reminded of the work of a violin maker whose violas i would kill for. Feng Jiang based in Ann Arbor, turns this turns into this .WOW.

wood purfling kept breaking on me until i discovered stupidly quite recently that it might work better if i bend them first. fiber installs right away and i can get away with murder. BUT i found out (the hard way) that if i pound fiber into the channel, the black outsides take on the shape of the walls of my badly cut channels. this mauls the line and definition of the purfling and makes it look like its about to throw up.

me and my router can't do corners so those are done by hand with a x'acto knife and channel tool. equal treatment for the back.

in short, purfling = hell
 

to be continued

Thursday, October 1, 2009

VSO rambling etc

there's work 40hrs a week, and there are kids i have to torture i meant teach... hmmm.... there's only 24hrs a day... where do i find time to practice or make instruments? it's already 1am, i just got done with 3 lousy hours of viola practice and i'm here on the computer and i'll have to be at school by 8am to find a practice room to hide in until rehearsal with accompanist and class etc... and i won't get to see my VSO until late in the evening. ARRRGGGHHH.

so anyway, i thought i would bring on some pictures of old stuff and write a little bit about them.
here's VSO#2:


the whole point of VSO#2 was to see if i could learn wood carving in a hurry. this was my first attempt at carving a human head onto some awfully hard maple. the work of Susanne Küster formed the basis for my inspiration. this fiddle was also the first time i tried routing the purfling channel with a Dremel rotary tool. it was also the first time i tried overboard antiquing.

VSO#2 features a one piece back made of poplar i bought at Home Depot. the sitka top came from Bob Tibbetts as usual. the sides and purfling are from IVC. the maple for the neck and fingerboard i bought on eBay from someone... the accessories i bought from dov-music.com.

concept based loosely on Gasparo da Salò. really didn't quite work out as you can see from the pictures.
i posted it at maestronet.com (one of my favorite haunts in the past few years) and got a lot of very insightful and helpful comments. you can see it for yourself here.

my bridges tend to look like this:


VSO #3 is the viola i've been playing on since it's completion. i have a love-hate relationship with her.


i hear things i like about her and things i can't stand. but it's like having an ugly kid. you learn to love your ugly kid even if no one else will! VSO#3 is posted on maestronet here. "original" design.


and here's VSO#4. based loosely on an Amati bros.


as posted on maestronet here.

you can get an idea of what she sounds like at 2 in the morning here: http://www.youtube.com/watch?v=rpC69QFi3OA  pretend you didn't hear the mistakes please.

that's all for now